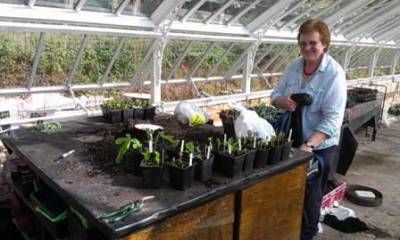
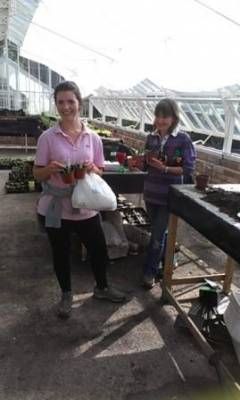
Today we ran another course in the 'Confident gardener' range. This time it was cuttings.
The course just runs for a morning and we never take more than 12 people- that way everyone gets my attention and gets to ask all the questions they need etc. The idea of the Confident gardener courses began after so many visitors said how confused they get on certain topics when they try to read up how to do things. My aim is to dispel all of these fears and uncertainties. I think that gardening should be accessible to all walks of life and, great though it is to have all the scientific know how, there is also a lot to be said for a more hands on approach.
We started the morning as all good mornings should start- with a coffee. I talked through the basics of the type of cuttings we do here at Hestercombe and then talked more specifically about the semi ripe cuttings that we were about to do. Then, armed with plastic bags and secateurs, we set off to the garden for half an hour to collect the material before heading up to the glasshouse to do our cuttings.


So far our glasshouse have no electricity so we have no propagation units , misting units or heat. That is fine it just means that we have some limitations but in this case its great as are replicating what a lot people have at home.
Here is some of the information from the course today. Now is a perfect time to take semi-ripe cuttings so have a go and double your stock!
Cuttings
Why take cuttings
Speed- faster than seed, vegetative clones, F1, reliability, a lot of material from one plant
Why not
May want to be grafted to a specific root stock e.g. to help determine disease resistance etc
Types of cuttings:
Soft wood
Taken from fresh new growth of the season-normally May/June time. They root the easiest but lose water and wilt quickly. As the material is so soft it is easy to bruise whilst handling and is therefore susceptible to botrytis. Take twice as many as you think you will need to compensate for the bad survival rate and space more thoroughly than normal to help stop the spread of botrytis.
Semi ripe
Taken later in the season, from current years growth, when stems are firmer and easier to handle. -normally mid summer to autumn.
Hardwood
Taken from dormant wood dec-feb. They are much slower to root but a lot tougher and don’t dry out. Pencil thick about 6 buds or about 8-12” long. Sloping cut at top above a bud, flat cut under a bud at bottom. This is so that a) you know which way up it goes and b) the water runs of the bud at the top. Can then just be placed into soil outside and left.
Root cuttings
A few plants can be produced by taking sections of their roots as propagation material. Normally these are plants that naturally sucker like Acanthus. The roots are thick and fleshy and so able to store enough food.
Leaf cuttings
Some plants can regenerate from sections of their leaves being placed onto compost. Normally on plants from Begoniaceae and Crassulaceae familys.
Instructions for semi ripe cuttings
Collecting material
It is best to take cuttings in the morning as the sap is rising and the sun isn’t too hot to make them wilt. Pick the material that you want by taking non-flowering current growth. Put the material inside a plastic bag and put in the shade until you are ready to prepare the cuttings. The plastic bag will help keep moisture locked in as the plant transpires and will save it from wilting. Make sure that your bag is clearly labelled so that you know what you have.
Preparing the cuttings
Using a sharp knife, or your fingernails, cut off all but the top few leaves. It will leave your cutting looking like a palm tree but the less leaves there are the less energy there is to be lost through transpiration.
Make a clean cut below a leaf node about 4-5” from the leaves. This area has a large amount of auxins(plant hormones) to stimulate growth and also has meristematic cells(growth cells). These cells are capable of changing their role to produce root cells. The main aim is to get the roots to establish as quickly as possible so that the plant has another way of getting nutrients other than photosynthesis.
Potting on your cuttings
It is best to use specific potting compost for your cuttings. The compost needs to provide good drainage and yet have a water holding capacity. It cannot be too rich in nutrients as they can burn the young roots. It also shouldn’t have too much nitrogen as the plants will produce too much soft sappy growth and this is prone to botrytis. You can mix your own potting compost. I use a mix of peat free multi purpose compost, loam and perlite. The loam and the perlite are sterile so they keep the nutrient level low. The perlite provides good drainage and keeps the mix light whilst the multi purpose has a good water holding capacity.
Depending on the amount of cuttings you are doing you can use trays or pots it doesn’t really matter as long as they are clean. The cuttings only stay in them until they have developed roots and are ready to be potted on to richer compost. Take your pot/tray and over fill with compost. Using a board, held vertically, and a sawing motion push off any excess compost. This gives an even amount. Then use the board to firm down the compost evenly. Wipe off any excess soil. I water at this stage to ensure even watering and in case the weight of the water pushes the cuttings down. Take your cuttings one at a time and dip into hormone rooting powder and shake off any extra. (More than anything the rooting powder is useful as it contains a fungicide). As the cuttings are semi ripe they are quite tough and can be pushed into the compost (for softwood you made need a dibber/pencil)
Make sure that they have enough space around them. Try to avoid cuttings touching or drooping over the edge- this will help cut down on disease.
Cuttings benefit from ‘bottom heat’ to encourage fast root growth so if you have a propagator use it. If not you can help your cuttings by creating a little microclimate for them by covering with a cloche to prevent transpiration. You could use an old pop bottle or a plastic bag as long as the cuttings aren’t touching it.
Keep your cuttings moist by watering or misting- this can be done by a handheld spray gun. If they are in a propagator or under a cloche make sure that they get a change of air daily to prevent a build up of air born disease.
Once the cuttings have formed good roots lift them by their leaves and prize them out with a dibber (or pencil!) they can then be re potted into more nutritious compost.
It’s that simple! A lot of plants will root just from being out in water. So don’t be afraid- just give it a go!


